

This Is the Right Order to Apply Your Makeup for a Flawless Look
 Updated: Jan. 27, 2023
When it comes to the perfect complexion, the right makeup order can make a huge difference
Every editorial product is independently selected, though we may be compensated or receive an affiliate commission if you buy something through our links. Ratings and prices are accurate and items are in stock as of time of publication.
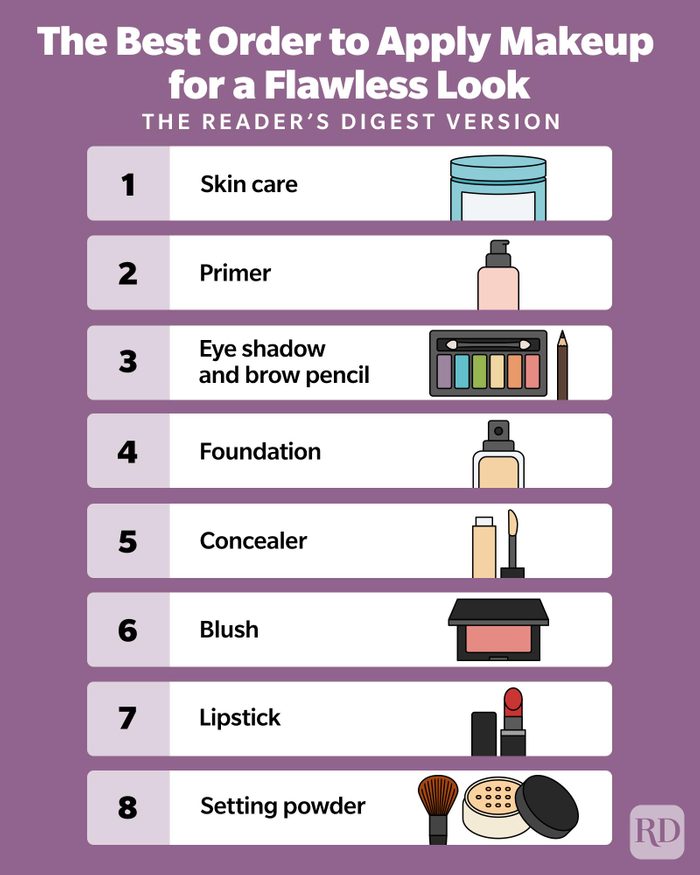
Yep, makeup order matters
If you’re taking the time to do a full face of makeup, you want it to look good, right? A lot of things can influence how it turns out. Whether you’re into natural makeup looks or something more glam, the products you use—and how you use them—can make a difference. Picking the best foundation and concealer for your skin type and tone is a must, as is paying attention to your age. There are plenty of makeup tips for the 40-and-over crowd that will help you look your best. Another thing that can make a difference when it comes to how your makeup turns out? Your makeup order.
Yup, you read that right. Just as the ideal skin-care routine order can help you put your best face forward, the right makeup order can give you a more efficient routine and more polished look. There are two schools of thought when it comes to makeup order: Some start with the face (think foundation, concealer and blush) and then highlight the eyes and lips, while others finish their eyes before moving on to the face.
“The truth is, there is no right or wrong on this,” says Matthew Waitesmith, a makeup artist and founder of Artís, a makeup brush line loved by celebrities. “But doing the eyes before foundation does allow you to clean up any particles that fall onto the under-eye area or cheek.” Ready to give it a go? Read on for the makeup order many professionals use to get the most flawless look possible.
Get Reader’s Digest’s Read Up newsletter for humor, cleaning, travel, tech and fun facts all week long.
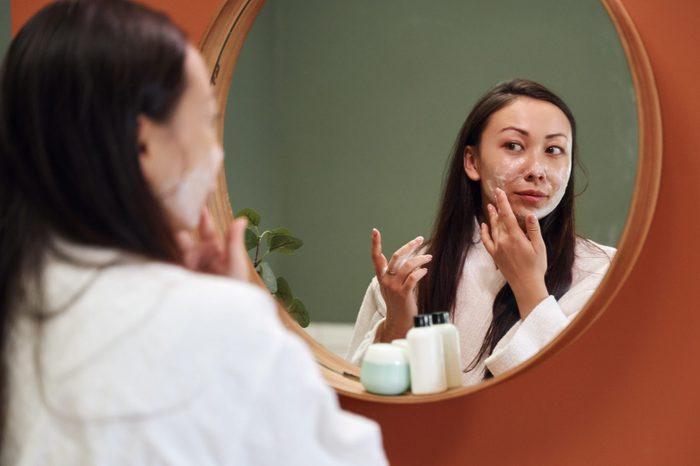
Step 1: Start with skin care
“It’s always good to start off with skin care so that it can absorb and hydrate the skin while you’re working on brows or eyes and before you put on foundation,” says celebrity makeup artist Judi Gabbay. After you’ve washed your face, apply your morning products, including face serums, eye cream and moisturizer. Experts recommend choosing a moisturizer based on your skin needs. For example, if you’re prone to oily skin, you may want a mattifying formula. Suffer from breakouts? Look for an oil-free moisturizer. There are also face moisturizers that contain SPF, which can save you a step.
If your moisturizer doesn’t have SPF, however, you’ll want to apply sunscreen next. The American Academy of Dermatology recommends selecting something with an SPF of at least 30.
Get the tools
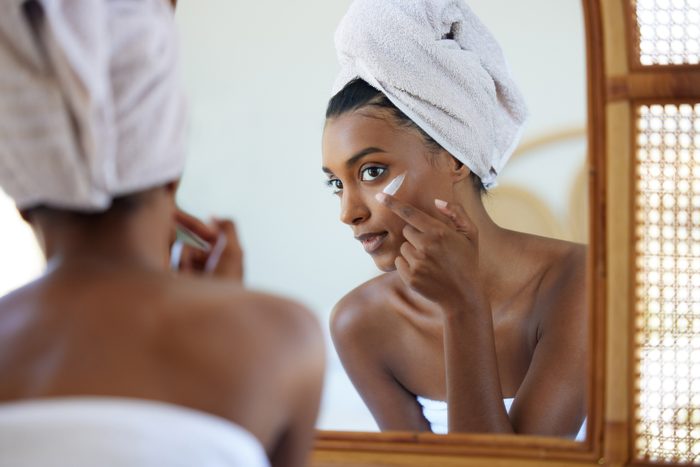
Step 2: Prep your skin with primer
After you finish applying your skin-care products, consider using a primer. The purpose of a primer is to give your makeup something to cling to so it lasts longer. It will also fill in fine lines, so your foundation and concealer won’t sink in and emphasize those areas. “Use a mattifying primer all over,” says makeup artist Genevieve Herr. “They can blur imperfections, smooth skin texture and mattify, giving you the perfect base for foundation.”
Get the tools

Step 3: Play up your eyes and brows
With your skin prep done, next in the makeup order comes your eyes. “I always start with eyes because eye shadow can create a lot of [pigment on] the face, which can be extremely hard to clean up if you have completed your skin first,” says Cait Rawlings, a makeup artist and content creator with the Plump It! brand. “By starting with your eyes, you have space to create as much mess as needed. When you are done, you can easily clean up the fallout with a makeup wipe before applying face makeup.”
After you’re done with eye shadow and liner, add your best mascara. “To avoid smudging, apply mascara to your upper lashes first. Then wait a few seconds before adding product to your lower lashes,” says Sarah Roberts, a makeup artist and founder of the site A Beauty Edit. “One other tip? Avoid pumping the wand in and out of the tube, which can dry it out and cause clumps.”
Finish your eye look by filling in your brows. (As with eye shadow, brow powder can flake onto your skin, another reason doing them before the rest of your face is key.) “Use a pencil or stiff, thin makeup brush to fill in any gaps in the brow to make it look uniform from end to end,” says Waitesmith. “If you are happy with the density of your brows, then all you really need to do is define the outer edges and fill in any gaps.”
Get the tools

Step 4: Apply your foundation
Once you’ve cleaned up any shadow or brow powder that’s traveled south, it’s time to work on your complexion. When it comes to choosing the right foundation for you, there is a lot to think about. A quick stroll down the nearest makeup aisle will reveal just how many options you have: There are foundations for mature skin, acne-prone skin, dry skin, oily skin and more. Whatever your preference, once you’ve found a formula you like, go ahead and apply your foundation.
Not sure what to use in the application? Janelle Thomason, an Emmy-winning makeup artist and founder of Cosmakery Cosmetics, prefers makeup brushes. “Sponges hold bacteria, absorb a lot of the product you’re trying to apply and are time-consuming,” she says. “A buffing brush will help glide your foundation evenly and efficiently. It also allows your makeup to last much longer because you blend it into the skin as opposed to a flat-top foundation brush or sponge that encourages your foundation to sit on top of the skin.”
Get the tools
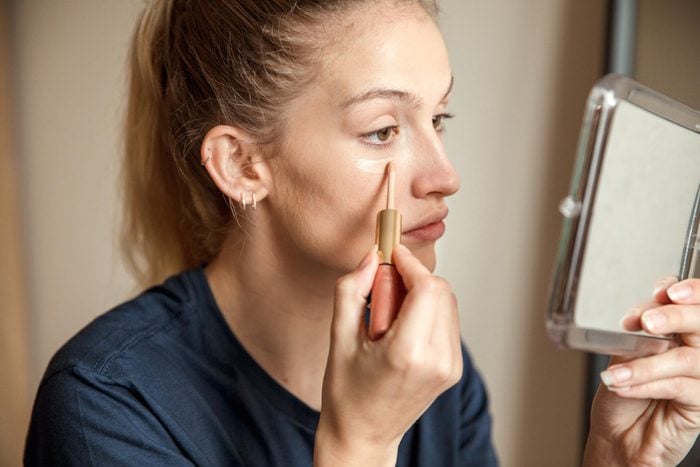
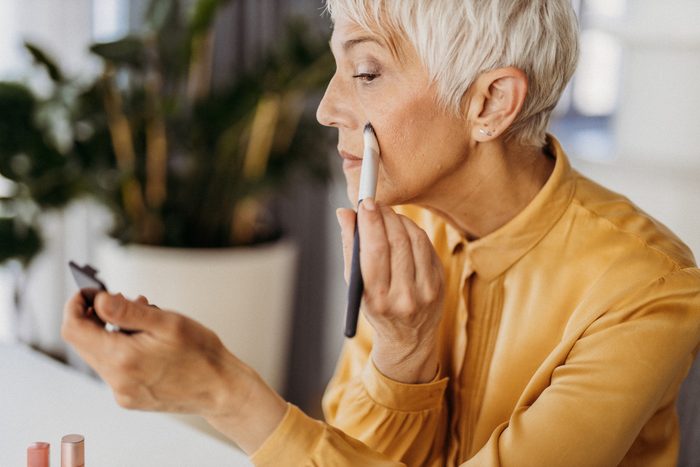
Step 5: Cover up with concealer
Applying concealer before foundation would be a big makeup mistake. If you do, you’ll wipe away your cover-up as you blend your foundation. So, once your foundation is fully blended, that’s when you want to add concealer.
“It is an excellent secret weapon to disguise dark spots, blemishes, those dreaded under-eye circles and other skin discoloration,” says Roberts. “Use a small amount of concealer, and apply it with your finger, concealer brush or makeup sponge. Gently blend to get flawless coverage.”
As for picking the right shade, it depends on what you want to disguise. For instance, you’ll want a redness-reducing concealer if you’re prone to spots or have rosacea. “For blemishes and discoloration, choose a shade of concealer that matches your foundation,” says Roberts. “For under your eyes, choose a shade of concealer that is lighter than your normal shade to brighten your eye area.”
Get the tools
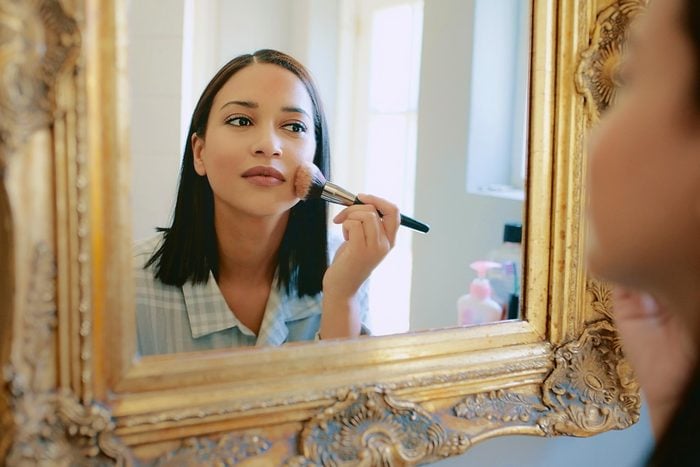
Step 6: Add blush
Once you’re happy with your face makeup, it’s time to make your cheeks pop with some blush. Since foundation and concealer even out your skin all over, adding a little color to your cheekbones will add dimension to your face. “You want to apply blush to the apples of your cheeks,” says Thomason. “If you have a fuller face and are looking for a slimming effect, you can keep your blush a bit higher, toward the cheekbones, for the illusion of a slimmer face.”
Get the tools

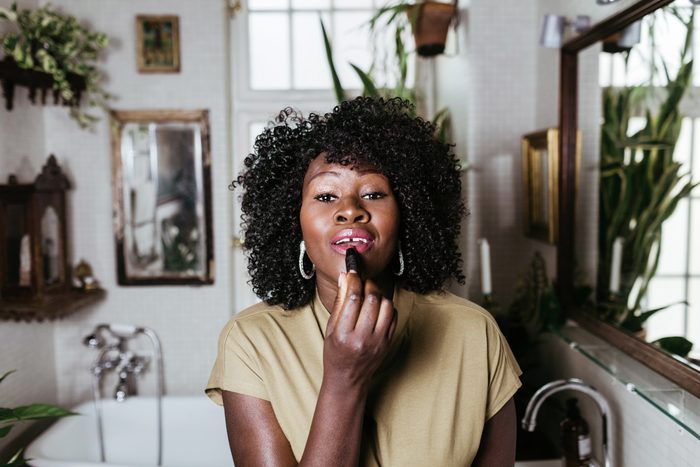
Step 7: Do up your lips
You’re almost done! When it comes to color cosmetics, adding lipstick is the last step in the makeup order. It’s a finishing touch that can add liveliness to your face. If you prefer a natural look, go for a lip balm or a light shade, like a nude lipstick. Want something more polished? A richer shade will do the trick. Once you find the right lipstick for your skin tone, you’ll be amazed by the difference it makes.
The key to making your lip look last is in the application. “First, apply a lip liner that blends well with the shade of your lipstick. This will create definition and keep your lipstick from bleeding,” says Roberts. “Then apply your lipstick either directly from the bullet or with a lip brush. You can add a second coat for better staying power.”
Want a look that will last all day and night? Roberts recommends a matte formula, which tends to stay put for longer.
Get the tools
Step 8: Set your look
You didn’t do all that work just to have your makeup melt away as soon as you step outside, right? The final step in your makeup order is to set everything in place. Most makeup artists prefer translucent setting powder for this. “Using a powder with pigment will dull all the beautiful work you’ve done applying your makeup. It can also alter your concealer and foundation shade,” says Thomason. “A translucent powder is perfect for setting. Then bring it along, and you can use it for touch-ups throughout the day.”
To apply, use a large, fluffy brush. Dip it into the powder and lightly dust it all over your face. Want to know another makeup artist secret? Try a setting spray. These liquid mists are usually a combination of water and alcohol. Spritzing one on your face can prevent makeup from fading or smudging.
Voila! You’re all done. Now go wow ’em.
Get the tools
- Laura Mercier Translucent Loose Setting Powder
- Dermablend Loose Setting Powder
- IT Cosmetics Your Skin but Better Setting Spray
Sources:
- Matthew Waitesmith, makeup artist and founder of Artís
- Judi Gabbay, celebrity makeup artist
- Genevieve Herr, makeup artist
- Cait Rawlings, makeup artist and content creator at Plump It!
- Sarah Roberts, makeup artist and founder of A Beauty Edit
- Janelle Thomason, Emmy-winning makeup artist and founder of Cosmakery Cosmetics
- American Academy of Dermatology: “Sunscreen FAQs”